
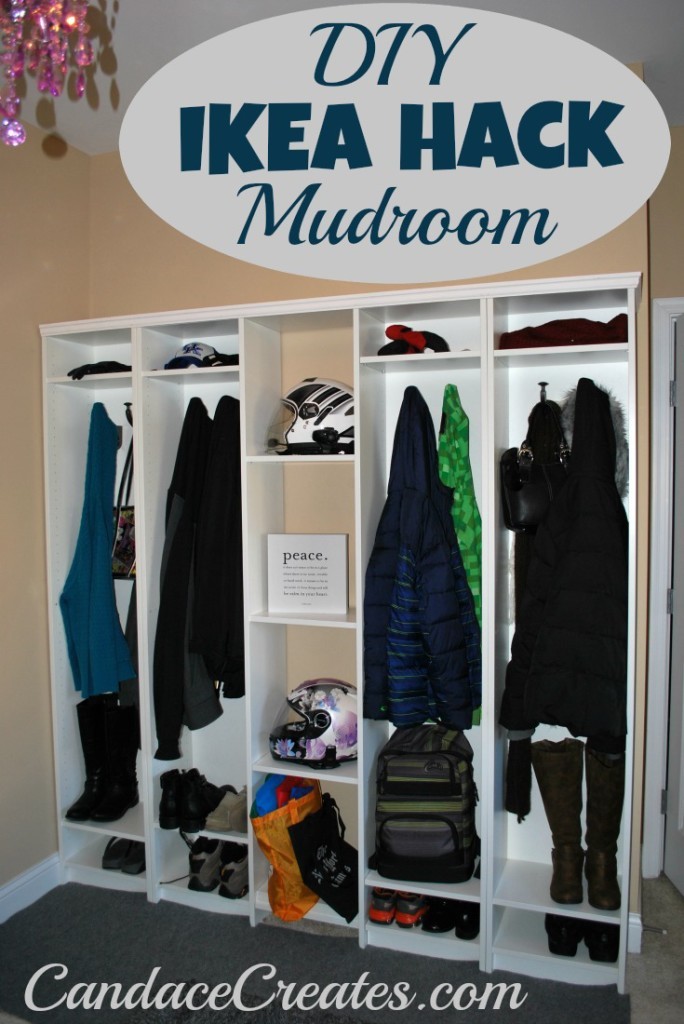
I was so tired of seeing my kitchen table covered in coats, backpacks, purses… I’m thrilled with my new mudroom which now holds our belongings perfectly.
My husband did a fantastic job on this project. I’m going to explain it in as much detail as I can. If you have any questions for him, please feel free to ask in the comment section.
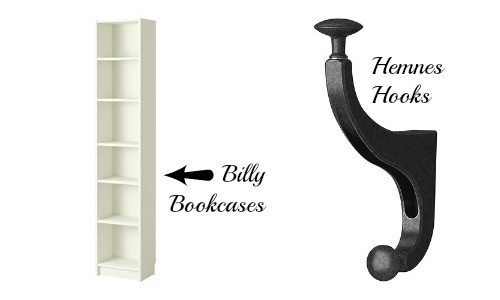
Most of the supplies came from IKEA. We bought 4 White Billy Bookcases (15 3/4”x11”x79 1/2”) and 8 Hemnes Hooks.
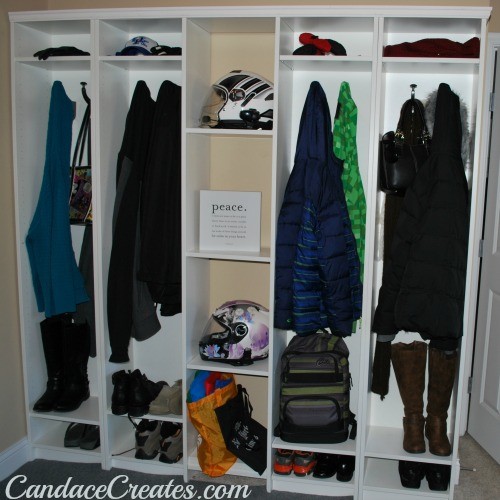
After putting together two of the bookcases, my husband decided to install some of the leftover shelves between the inside bookcases. They are perfect for helmets, shopping bags…
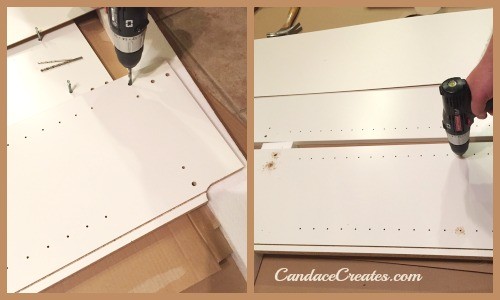
In order to do this, he had to add holes on the outside of the 2 bookcase panels that would be in the middle of the mudroom lockers. He propped up those panels and drilled all the way through them from the inside. The top and bottom ones must be done for the stable shelves. You can pick whatever other spots you want the adjustable shelves.
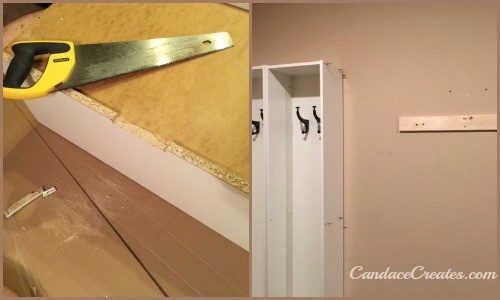
Our baseboards were too big for the cutouts in these bookcases so my husband had to saw larger sections at each bottom.
Put the extra shelf holders in the drilled holes where needed as seen in the picture above.
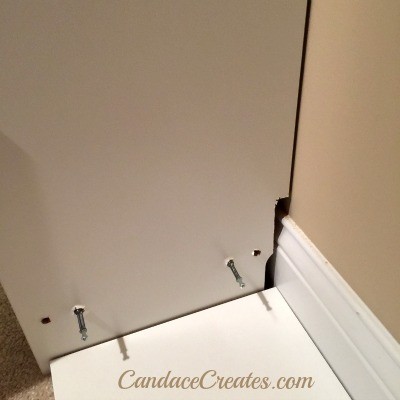
The hooks were attached through the bookcases into a board screwed into wall studs. We wanted the hooks to be very stable. I knew my kids and I would be hanging heavy backpacks and purses. Sections need to be cut out of the back of the bookcases for the board if you choose this option.
We added crown molding just to make it extra pretty since it is covering an entire wall of my craft room and I have to look at it often. He used a nail gun to install it. I covered the holes with filler after this picture was taken:
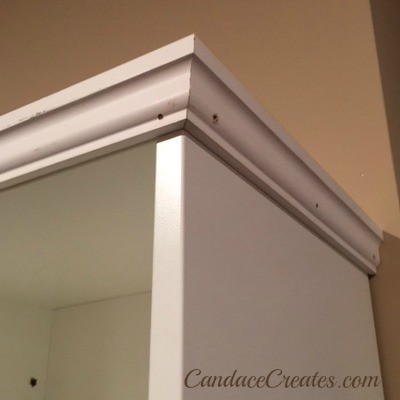
You can also see a screw in the picture above where he connected the bookcases. This added additional stability.
Here is the final product:
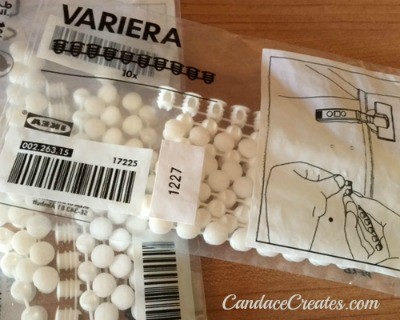
I still need to add these nifty hole plugs I also found at IKEA:
I’m happy to report it is heavily used. My kitchen table has finally been reclaimed.
I want to thank PolkaDotChair.com for her great idea that inspired this project. I pinned her post months ago for my husband to see. I absolutely love the inside shelves and crown molding he added for me.
This post is part of the Candace Creates archive — a collection of creative projects from the early days of this blog. Creativity has always been part of my healing journey, and it still is. But over the years, this space has grown into something deeper.
Today, Body Mind Soul Essentials is about helping women reconnect with God, rediscover who they are, and rebuild their days with peace and purpose — body, mind, and soul. If that resonates with you, I’d love for you to look around. There’s a lot more here for you.


Love, love this. Just wish I had room for one like it. But its got me to thinking what I need to do for our laundry room.
Thanks Sandy! It has helped tremendously with my stress when walking in the door and seeing my kitchen. It’s so pretty now. My table is actually for dining :)!
I love this!!! Your husband did a great job. This was such a great idea. I bought an over the door hanging coat rack for our laundry room a couple of years ago and it has been so helpful for us. If we had enough room something like this would be even better. Having a place to hang things from is always nice.
Even a coat rack is a big help, Sonya. We didn’t even have that. Our little coat closet was so overwhelmed with other junk. Everyone needed a specific spot for just them. I’m loving it!
Cool! ! Will be sharing your post on the Creekside blog … this is a must have wall for every home with kids.
Thanks, Candace …
Thanks so much for sharing, Linda! I agree it is a must have. I don’t know how I lived for 8 years in this house without one. It has relieved a lot of unnecessary stress!
Don’t you just love IKEA? We spent time there yesterday just walking around as there are a few different projects we are wanting to do around the house. Nice job on the mudroom lockers!
I’m obsessed with IKEA, Beth! It’s always a very expensive day when me and my hubby walk around there :). They have so much cool stuff. We try to make a trip every couple of years.
I am dying to do this in our garage! Looks great. Glad you have your kitchen table back! 🙂
It would be perfect in a garage, Jamie! Let me know if you have any specific questions. I tried to explain it to the best of my ability, but I’m sure I left out some helpful details. I’m thrilled to have my table back :)!
Candace, this turned out so cute! What a great project. I want one too. Unfortunately my mud room is a hallway, do you think something like this would work there?
Thanks, Jen! It depends on the width of your hallway. The bookcases are 11″ deep and my big puffy coat sticks out a couple of inches. It could probably be packed in there better but I would probably plan for at least 13″.
Good to know! I will get to measuring!
This looks fantastic! I love a good Ikea hack – you’ve done a great job!
Thanks so much, Karen! I love all things IKEA too. The hacks I’ve found on Pinterest are amazing. You can really customize their pieces.
Pinning! These are wonderful!
Thanks for the pin, Tayler! I hope you get to make your own. It’s life changing :)!
Love this! We just did our front entrance and will be moving to our mudroom next! Thanks for the inspiration!
Good luck, Becky! Let me know of any questions if you decide to go this route. I desperately need to work on our front entrance!
Great job – love what you two did with this space!
Thanks, Mindy! It has brought me a great deal of peace :).
I do have a question for your hubby….can he build these for our house? OMG what a great idea!! Love this, thank you for sharing and linking up with us!!
I love your question, Amber! I have worn that poor man out. He was off work most of December and I gave him a giant to-do list. I’m happy to say he finished almost all of the list. I’m sure he’s relieved to be back at work now :).
I so wish our house had a mudroom, but your DIY shelf unit makes me want to go carve out a space for this! I especially love that you put a Peace quote right in the center – isn’t that what we all would like – organize our clutter and find peace!
I’m shocked by the peace these lockers have brought me, Kristie. I hope you can find a space for this. It’s incredibly helpful!
That looks awesome!! Seems like it isn’t too hard of a project either. The crown molding was a great touch.
Thanks for linking up with the Best of the Blogosphere link party.
Thanks, Emmy! It really wasn’t a difficult project. I was impressed with how quickly he finished. I love the crown molding! It definitely pretties it up some :).
Love this! I wish I had a good spot to create a mud room in my home. Thanks for linking up to Best of the Blogosphere.
It’s really not as big as it looks. Maybe you could find an empty wall somewhere. It doesn’t have to be 4 bookcases wide. You could always start with 2 :). Thanks for the party, Kendra!
Hi Candace! I am stopping by from the Pin me linky party #121. I really love this idea – it looks good and is practical. As a gardener I always struggle where to put my dirty working clothes. I don´t want to get mud all over our appartment. This is something I could use at home. I shared it on Pinterest.
Charlotte – My Green Nook
Thanks so much for the visit and pin, Charlotte! These would be great for your gardening stuff. You can customize the shelving to better suit your needs. IKEA also has these bookcases in black which may work better for you. The white cleans off easily though if you would rather have it.
Wow, I love this! Pinned it
Thanks, Sinea! It is incredibly helpful to control all those winter accessories we have to use right now :).
Great hack and so practical! I bet the Ikea Hacks website would love your project!
I’ll have to check that site out! Thanks for the advice :).
Are the shelves connected together? Also, did you anchor them?
Hi Sara, The bookshelves were screwed together as pictured above. They were connected to the wall through the board which was attached at studs so no anchors were needed. That part is also pictured above. I hope that answers your questions!
what size is the board you used behind the bookcase to screw the hooks into? A 1×4 is too thick to fit smoothly behind the backing board there is only a half inch space available.
Hi Natalie, We used a 1X4 board. The back of the bookcase is not completely flush with the wall, but the gap is less than a half inch so it didn’t bother me. My husband bought quarter round to trim it with, but I didn’t feel like it needed it. That’s definitely an option though if you don’t want any gap. Good luck! I hope that helps.
Thanks we ended up using wood trim which is a little thinner instead of a 1×4 and it worked great. Thanks for letting me know.
Wonderful job and idea. I was wondering if 11in deep is too shallow? Do you wish it was deeper? Do things stick out?
Thanks, Becky! I like the depth of it. I do have things stick out of mine but that’s mainly because I pile way too much stuff in it :). For just a backpack or purse and a couple of coats, it’s a perfect size in my opinion. Shoes fit really well too. Only my husband’s motorcycle boots stick out a bit. His other shoes are fine though.
Hi, this is a great idea and we are doing the same. Can you explain a bit more how the hooks were attached to the wall. I see a board on the wall in your photo. Does this mean the book case is out from the wall slightly and you then screwed the hooks thru the back and into that extra board. Any extra information would be great. Securing the hooks is the one thing I am struggling with. Thanks
Hi Paul, Yes there is a gap between the wall and bookshelf. The board is attached to studs in the wall for support and the hooks go through the back of the bookshelf into the board. Hopefully that helps :).
How old is this article? I’ve read that the IKEA Billy Bookcases now have a shelf in the middle that cannot be removed, which would make it not work?
This post is several years old, but I just talked to my husband and he said those bookshelves had fixed position shelves in the middle as well. He didn’t install those except for the one we used for just shelving. I’m not familiar with the newer ones though so you may need to research if that shelf can be removed. Most of IKEA furniture is heavy on the build yourself side, so I would be surprised if that shelf is already somehow installed, but I can’t make that promise.